API Key Management
This guide walks you through creating and using API keys to authenticate with the Allfly Connect API.
Overview
API keys are required to authenticate requests to the Allfly Connect API. This guide covers:
- Navigating to the Integrations settings
- Creating a new API key
- Securely storing your API key
- Testing your API key with the Swagger documentation
- Making your first authenticated API request
API keys are displayed only once during creation. Make sure to copy and store your API key securely before closing the dialog.
Prerequisites
- Administrator or Owner role in Allfly Quest
- Access to your organization's Allfly Quest account
Step-by-Step Guide
1. Navigate to Integrations Settings
- Log into your Allfly Quest account
- Click on Settings in the navigation menu
- Select the Integrations tab
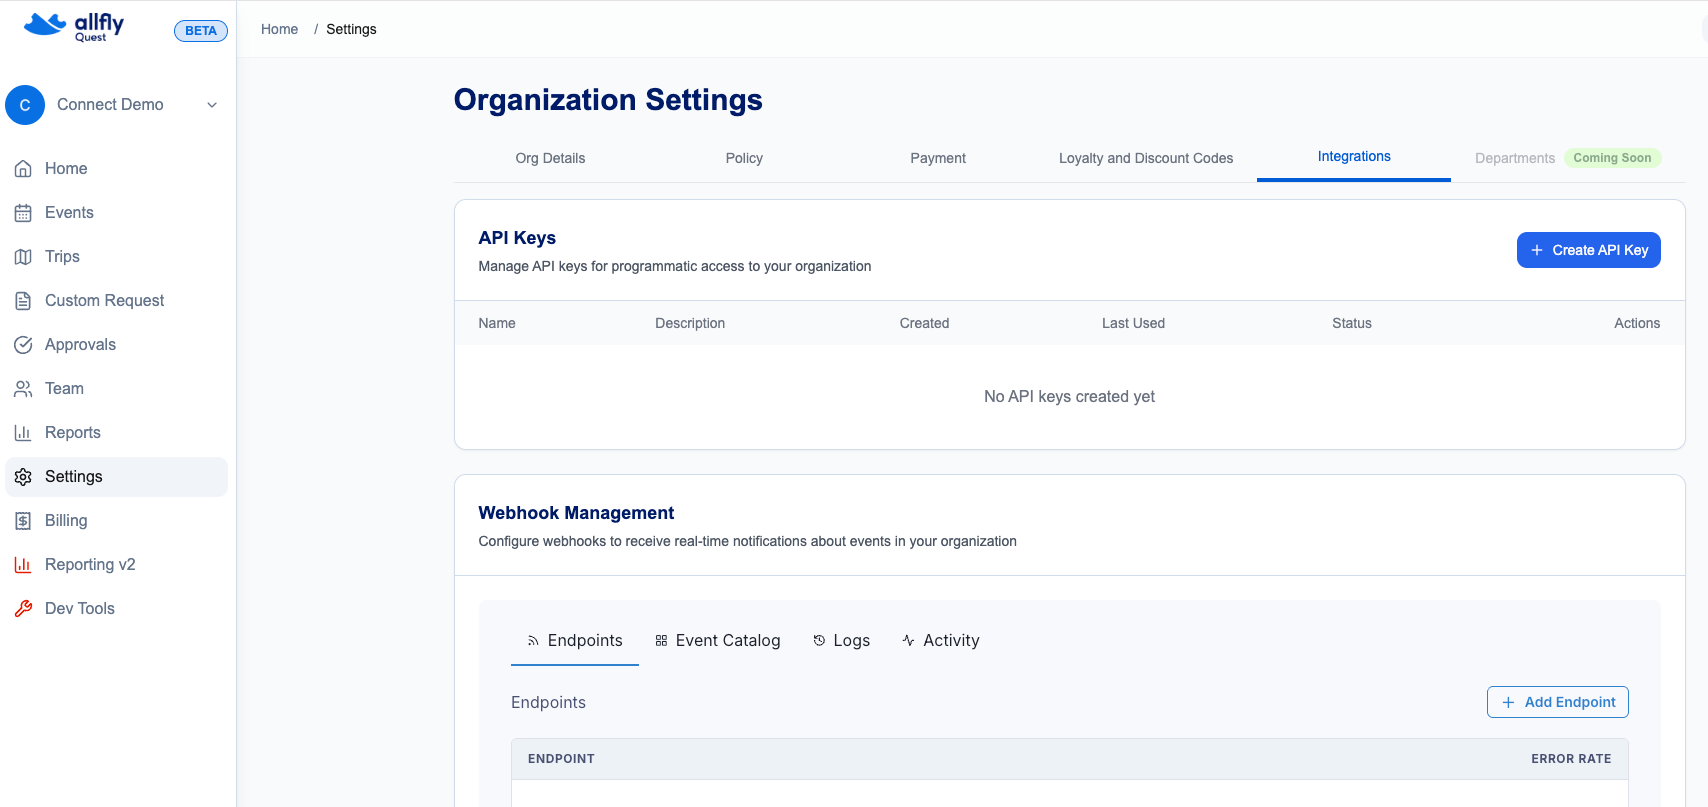
2. Create a New API Key
- Click the Create API Key button
- Enter a descriptive name for your API key (e.g., "Production Integration", "Development", "Partner Integration")
- Click Create
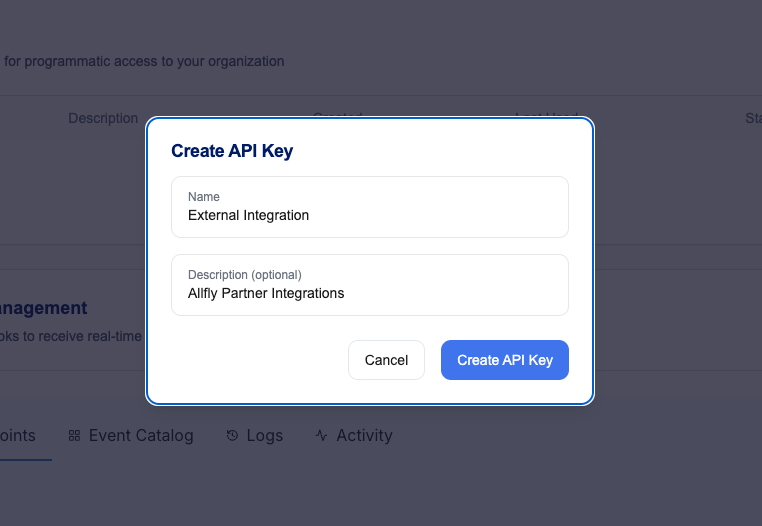
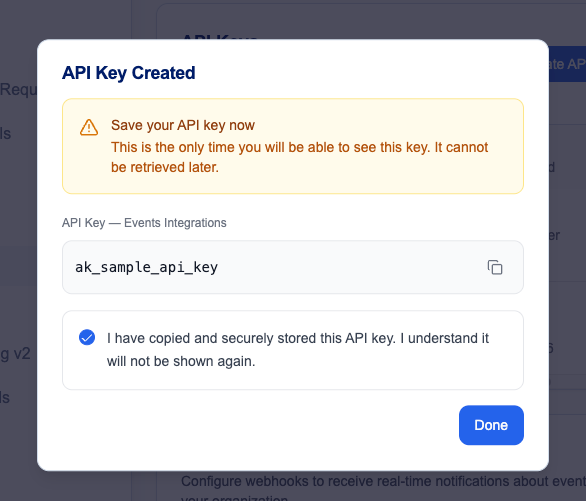
3. Copy and Store Your API Key
This is the only time your API key will be displayed. If you lose it, you'll need to create a new one.
- Click the Copy button to copy your API key to the clipboard
- Store the API key securely in your password manager or secrets management system
- Check the acknowledgment box confirming you've saved the API key
- Click Done
4. Access the Swagger Documentation
-
Navigate to the Allfly Connect API Swagger documentation
-
The Swagger UI provides interactive API documentation where you can test endpoints
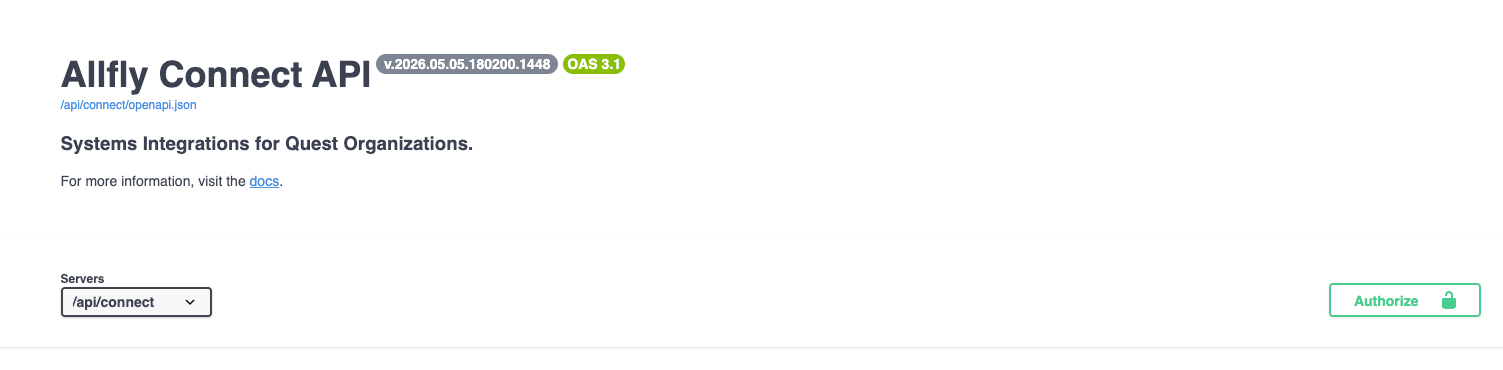
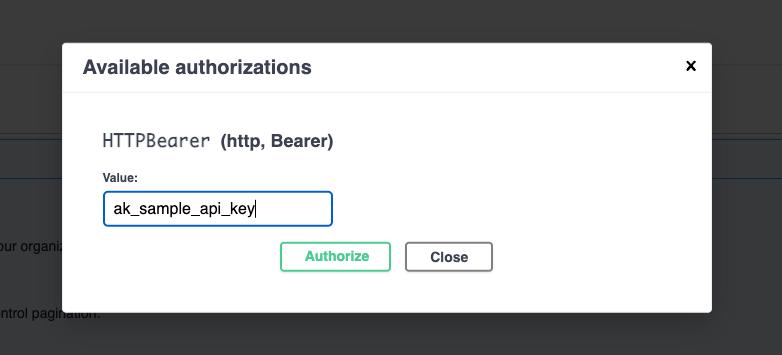
5. Authorize with Your API Key
- Click the Authorize button at the top of the Swagger UI
- In the authorization dialog, paste your API key into the Value field
- Click Authorize
- Click Close to return to the documentation
6. Test with the GET Events Endpoint
- Scroll to the Events section in the Swagger UI
- Click on the GET /events endpoint to expand it
- Click the Try it out button
- Click Execute to send the request
- Verify that you receive a successful response (HTTP 200) with your events data
If you see event data in the response, your API key is working correctly.
Troubleshooting
401 Unauthorized Error
If you receive a 401 Unauthorized error:
- Verify that you've authorized in Swagger with your API key
- Check that you copied the complete API key without extra spaces
- Ensure your API key hasn't been deleted from the Integrations settings
No Events Returned
If the request succeeds but returns an empty array:
- This is normal if you haven't created any events yet
- Try creating a test event in Quest and re-running the request
Best Practices
- Use descriptive names: Name your API keys based on their purpose or environment
- Rotate regularly: Create new API keys periodically and delete old ones
- Limit exposure: Only share API keys with team members who need them
- Monitor usage: Regularly review last used date of your API keys in the Integrations settings
- Delete unused keys: Remove API keys that are no longer needed
Next Steps
Now that you have a working API key, you can:
- Explore other API endpoints in the Swagger documentation
- Set up webhook integrations to receive real-time event notifications
- Integrate the API into your application or service
Managing Existing API Keys
To view or delete existing API keys:
- Go to Settings > Integrations
- View the list of active API keys
- Click the delete icon next to any key you want to remove
- Confirm the deletion
Deleting an API key immediately revokes access for any applications using that key.