Webhook Management
This guide walks you through setting up and managing webhook endpoints to receive event notifications from the Allfly Connect API.
Overview
Webhooks allow your application to receive instant notifications when events occur in Allfly Quest. This guide covers:
- Navigating to the Webhook Management interface
- Creating a new webhook endpoint
- Configuring event subscriptions
- Securing your endpoint with signing secrets
- Testing webhook delivery
- Monitoring and managing endpoints
You can also configure webhooks programmatically using the Connect API. See Consuming Webhooks for API-based configuration.
Prerequisites
- Administrator or Owner role in Allfly Quest
- Access to your organization's Allfly Quest account
- A publicly accessible HTTPS endpoint to receive webhook events
Step-by-Step Guide
1. Navigate to Webhook Management
- Log into your Allfly Quest account
- Click on Settings in the navigation menu
- Select the Integrations tab
- Click on Webhook Management to access the webhook dashboard
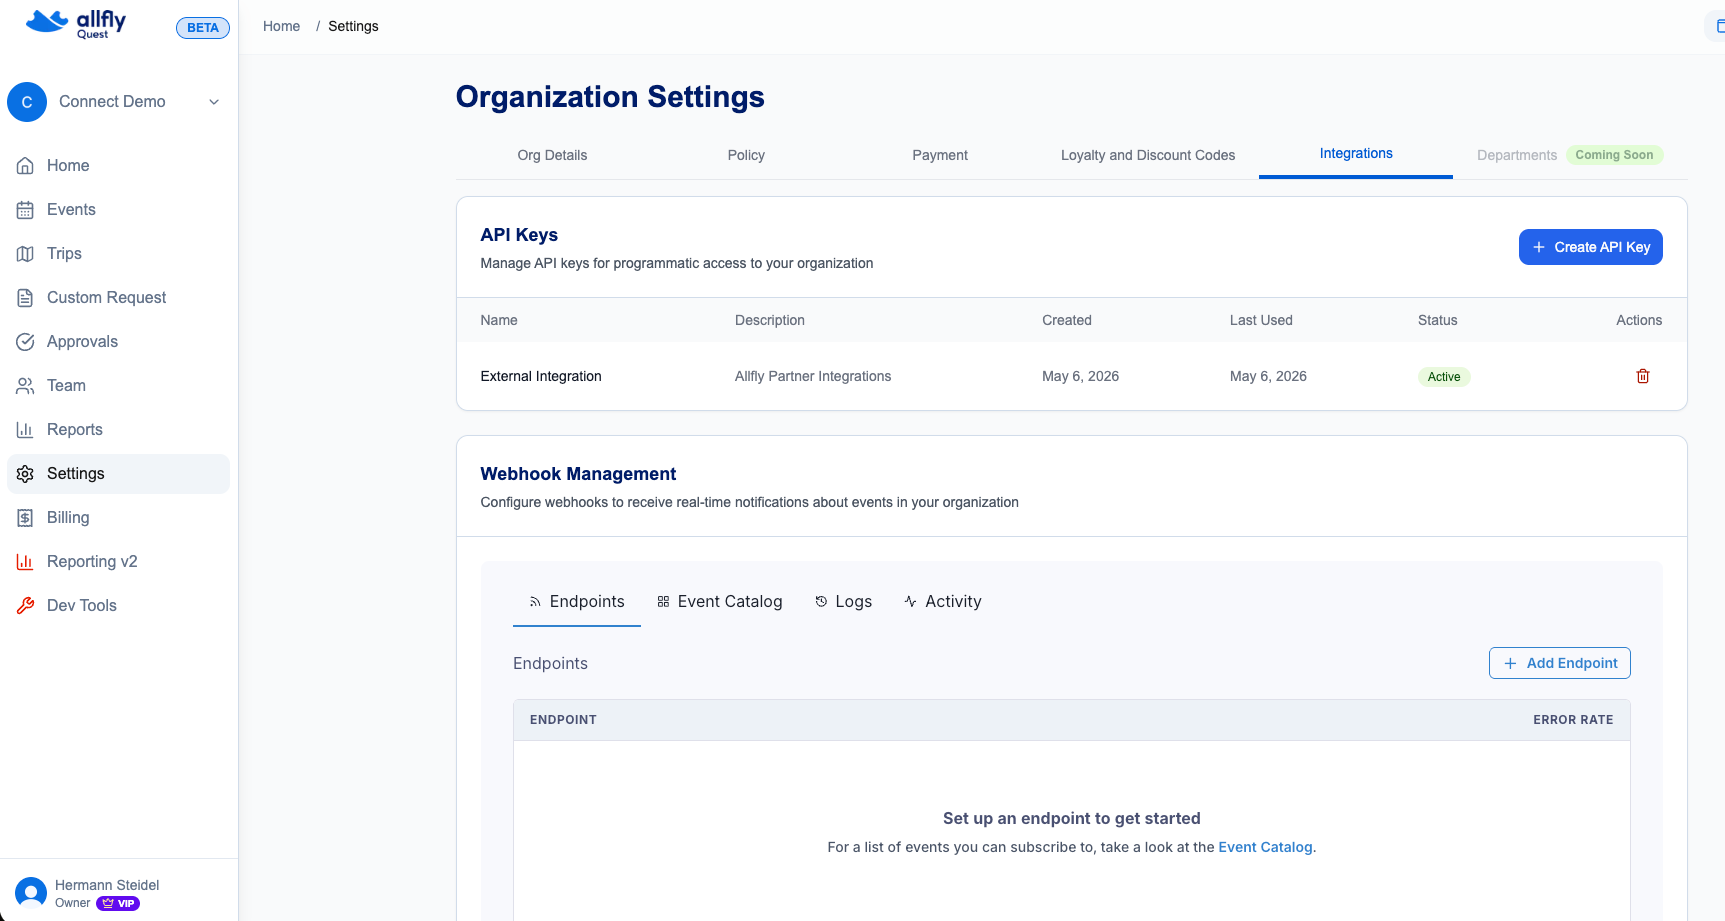
The webhook dashboard displays all your configured endpoints and their current status.
2. Add a New Endpoint
- Click the + Add Endpoint button
- The endpoint configuration page will appear
3. Configure Endpoint URL and Description
- Enter your webhook endpoint URL in the Endpoint URL field
- Must be a valid HTTPS URL (e.g.,
https://api.yourapp.com/webhooks/allfly) - The endpoint must be publicly accessible and ready to receive POST requests
- Must be a valid HTTPS URL (e.g.,
- Add a Description to help identify this endpoint's purpose (e.g., "Production CRM Integration", "Slack Notifications")
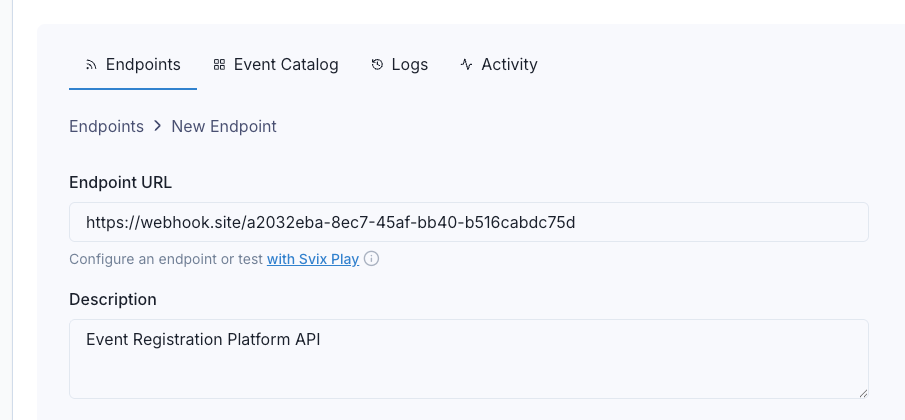
Your endpoint must use HTTPS. HTTP endpoints are not supported for security reasons.
4. Subscribe to Event Types
- Select which event types this endpoint should receive
Start with a subset of event types during development and expand as needed. You can modify subscriptions at any time.
5. Create the Endpoint
- Review your endpoint configuration
- Click Create to save the endpoint
- Your new endpoint will appear in the endpoints list with an "Enabled" status
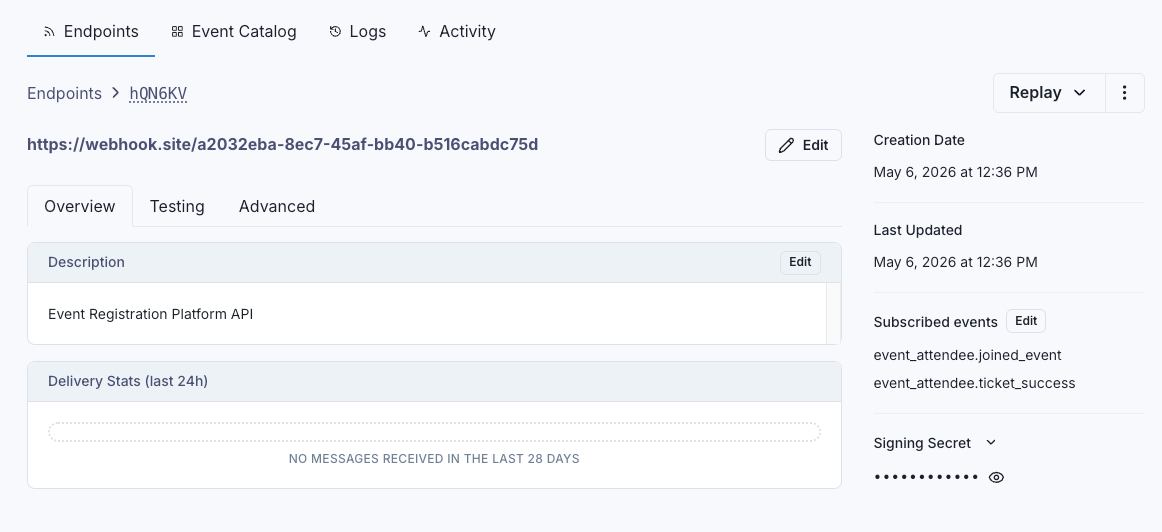
6. Access Your Signing Secret
After creating the endpoint, you'll need the signing secret to verify webhook signatures:
- Click on your newly created endpoint in the list
- Navigate to the Settings tab
- Locate the Signing Secret section
- Click Reveal (eye) to display the secret
- Copy it to your clipboard
- Store this secret securely in your application's environment variables or secrets manager
Keep your signing secret secure. Anyone with access to this secret can forge webhook requests to your endpoint. Never commit it to version control.
7. Test Your Endpoint
Before going live, test that your endpoint can receive and process webhooks:
- In the endpoint details view, click the Testing tab
- Select an event type from the dropdown
- Click Send Example to send a test webhook
- Verify that your endpoint receives the test event and returns a 2xx status code
If the test succeeds, you'll see a success message. If it fails, check:
- Your endpoint URL is correct and publicly accessible
- Your endpoint returns a 2xx status code within 15 seconds
- Your firewall/security groups allow incoming requests from Svix
- Your endpoint is not rejecting the request due to signature verification (disable temporarily for testing)
8. Monitor Webhook Deliveries
- Click on your endpoint to view its details
- Navigate to the Logs tab
- View recent webhook deliveries, including:
- Delivery timestamp
- Event type
- HTTP status code
Click on any message to view detailed information including the request payload, response, and headers.
Advanced Configuration
Custom Headers
You can add custom HTTP headers to all webhook requests sent to your endpoint:
- Click on your endpoint
- Navigate to the Advanced tab
- Add a new Key and Value
- Cliek the Plus button to save it
Common use cases include:
- Authentication tokens
- API versioning headers
- Custom routing identifiers
Managing Endpoints
Disabling an Endpoint
To temporarily stop receiving webhooks without deleting the endpoint:
- Click on the endpoint
- Navigate to the 3 dots button on the top right
- Toggle the Disable Endpoint item
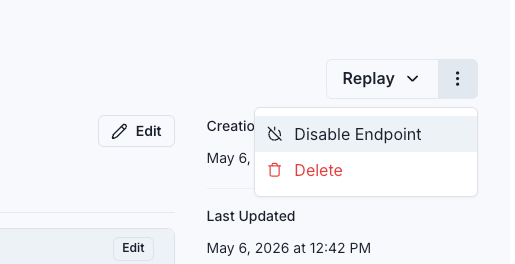
The endpoint will stop receiving events but all configuration remains saved.
Rotating Signing Secrets
To rotate your signing secret for security purposes:
- Click on your endpoint
- In the Signing Secret click on the down arrow
- Click on "Rotate Secret"
- Confirm the rotation
- Reveal the Signing Secret to copy it
Deleting an Endpoint
To permanently remove a webhook endpoint:
- Click on the 3 dots menu on the top right
- Click on Delete
- Confirm the deletion
Deleting an endpoint is permanent and cannot be undone. The endpoint will immediately stop receiving events.